In the vast digital landscape, where content is king, the importance of a striking Canva Thumbnails cannot be overstated. Thumbnails serve as the gateway to your content, enticing viewers to click and explore further. Creating an eye-catching thumbnail is an art, and with the user-friendly platform, Canva, at your fingertips, the process becomes not only efficient but also enjoyable. In this step-by-step guide, we will delve into the world of Canva and unveil the secrets to crafting compelling thumbnails that grab attention and boost your content’s click-through rate. Canva Thumbnails
Step 1: Sign Up and Access Canva
If you haven’t already, sign up for a Canva account. Once logged in, navigate to the dashboard, where you’ll find a plethora of design options.
Step 2: Choose the Right Template
Click on “Create a design” and select the “Custom dimensions” option. For a standard YouTube thumbnail, enter 1280×720 pixels. Canva offers a range of predefined templates suitable for various platforms, including YouTube, Instagram, and more.Thumbnails in Canva
Step 3: Select a Background
Choose a background that complements your content and aligns with your brand. Canva provides an extensive library of backgrounds, including solid colors, gradients, and patterns. You can also upload your own images for a personalized touch. Thumbnails in Canva
Step 4: Add Compelling Imagery
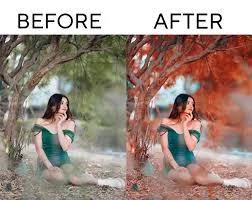
Search Canva’s vast image library for visuals that resonate with your content. Whether it’s a photograph, illustration, or icon, select an image that conveys the essence of your video or article. Ensure that the imagery is high-quality and relevant to capture viewers’ attention. Thumbnails in Canva
Step 5: Incorporate Text Elements
Annotate your thumbnail with concise and compelling text. Choose a bold and legible font that aligns with your brand’s style. Canva offers various text styles, sizes, and colors, allowing you to experiment until you find the perfect combination. Consider adding a catchy title or tagline to spark curiosity.
Step 6: Use Elements and Icons
Enhance your thumbnail with Canva’s extensive collection of elements and icons. These can add flair and emphasis to your design, guiding the viewer’s eye and reinforcing the content’s theme. Experiment with placement and size to achieve a balanced composition.
Step 7: Apply Filters and Adjustments
Fine-tune your thumbnail’s appearance by applying filters and adjustments. Canva allows you to modify brightness, contrast, saturation, and more. This step ensures your thumbnail maintains a cohesive look and aligns with your brand’s aesthetic.
Step 8: Preview and Download
Before finalizing your design, use Canva’s preview feature to see how your thumbnail will appear on various devices. Once satisfied, click “Download” and choose the appropriate file format (JPEG or PNG). You’re now ready to upload your attention-grabbing thumbnail to your platform of choice.
Conclusion:
Creating a compelling thumbnail in Canva is an exciting journey that combines creativity with user-friendly design tools. By following these steps, you can elevate your content’s visual appeal, enticing viewers to click and explore what you have to offer. Remember, a well-crafted thumbnail is not just a gateway to your content; it’s a powerful invitation that sets the stage for an engaging viewer experience. Happy designing!
check out more related posts…. Click here