Category: Photo&video Editing

  • Urdu Status Videos in Alight Motion

    How to Create Urdu Status Videos in Alight Motion: A Step-by-Step Guide

    Are you looking to create eye-catching Urdu status videos that stand out on social media? Alight Motion is a powerful mobile app that makes it easy to craft stunning videos with beautiful animations, effects, and text. In this blog post, we’ll walk you through the process of making Urdu status videos in Alight Motion, ensuring that you impress your friends and followers.

    Why Choose Alight Motion for Urdu Status Videos?

    Alight Motion is ideal for creating status videos for several reasons:

    • User-Friendly Interface: The app is intuitive, making it accessible for both beginners and experienced editors.
    • Versatile Features: With various animation options, effects, and text styles, you can bring your creative ideas to life.
    • Support for Multiple Languages: Alight Motion supports Urdu text, allowing you to create engaging content effortlessly.

    Step-by-Step Guide to Making Urdu Status Videos in Alight Motion

    Step 1: Set Up Your Project

    1. Download and Install Alight Motion: If you haven’t already, download Alight Motion from the Google Play Store or Apple App Store and install it on your device.
    2. Open the App: Launch Alight Motion and tap the “+” icon to create a new project.
    3. Choose Aspect Ratio: Select an aspect ratio suitable for status videos, such as 9:16 for WhatsApp or Instagram Stories.

    Step 2: Add a Background

    1. Select Background Layer: Tap on the “Layer” button and choose “Background.”
    2. Choose a Background: You can opt for a solid color, gradient, or an image from your gallery. Select one that complements your message.
    3. Adjust Background: Use the transform tools to fit the background to your canvas.

    Step 3: Add Urdu Text

    1. Add Text Layer: Tap “Layer” > “Text” to create a new text layer.
    2. Type in Urdu: Use an Urdu keyboard or app (like Google Indic Keyboard) to enter your desired text. Keep it short and impactful for maximum effect.
    3. Style Your Text: Customize the font, size, color, and alignment using the text properties menu. Choose a font that resonates with your message.

    Step 4: Incorporate Animations and Effects

    1. Animate Your Text: Select the text layer, tap “Animation,” and choose from various entrance, exit, or looping animations to make your text dynamic.
    2. Add Visual Effects: Explore the “Effects” tab to enhance your video with filters, shadows, or glows. Experiment to see what fits best with your style.

    Step 5: Add Music or Sound

    1. Include an Audio Layer: Tap “Layer” > “Audio” to add background music or voiceover.
    2. Import Music: Choose a track from your device or use built-in sounds. Ensure the audio complements your video’s mood and message.

    Step 6: Preview and Export Your Video

    1. Preview Your Work: Tap the play button to see how everything comes together. Make any necessary adjustments.
    2. Export Your Video: Once you’re happy with the result, tap the export button (usually an upward arrow) to save your video. Select your desired quality and format.

    Tips for Creating Engaging Urdu Status Videos

    • Keep It Short: Status videos should be concise and engaging. Aim for a duration of 15 to 30 seconds.
    • Focus on Visuals: Use vibrant colors and eye-catching animations to attract viewers’ attention.
    • Stay Relevant: Use trending quotes or popular themes to connect with your audience effectively.

    Adding Urdu Text

    • Text Tool: Use the text tool to insert Urdu text into your video. Ensure you have a suitable Urdu font installed on your device.
    • Alignment and Formatting: Experiment with different text alignments, fonts, and sizes to achieve the desired look. Consider adding effects like shadows or outlines for added visual appeal.

    Incorporating Urdu Audio

    • Audio Import: Import your preferred Urdu audio track into the project. This could be a song, a voiceover, or any other sound effect.
    • Synchronization: Align the audio with your video’s visuals to create a seamless experience. Adjust the audio’s volume and speed if necessary.

    Using Animations and Effects

    • Animation Tools: Alight Motion offers a wide range of animation tools. Create dynamic effects like fading, zooming, and panning to enhance your Urdu status video.
    • Keyframes: Utilize keyframes to precisely control the timing and movement of elements within your video.

    Exporting Your Urdu Status Video

    • Settings: Once you’re satisfied with your creation, head to the export settings. Adjust the resolution, frame rate, and compression level based on your preferences and platform requirements.
    • Save and Share: Export your Urdu status video to your device’s gallery. You can then share it on social media platforms like Instagram, TikTok, or WhatsApp.

    How to Import XML presets file in Alight motion

    How to Import and Use XML Presets in Alight Motion: A Complete Guide

    If you’re looking to elevate your video editing game, Alight Motion is one of the best mobile applications available. Among its many features, the ability to import and use XML presets can significantly streamline your workflow, allowing you to apply professional-quality animations and effects with ease. In this blog post, we’ll walk you through the process step-by-step, ensuring you can utilize XML presets like a pro.

    What Are XML Presets?

    XML presets in Alight Motion are pre-defined animation and effect configurations that can be imported into your projects. These presets save you time and effort by providing ready-made templates for common animations, transitions, and styles. Whether you’re creating a dynamic status video or an engaging promotional clip, using XML presets can make your projects stand out.

    Why Use XML Presets?

    1. Efficiency: Speed up your editing process by applying complex effects with just a few taps.
    2. Consistency: Ensure a uniform look across multiple projects by reusing your favorite presets.
    3. Creativity: Experiment with various styles and effects without starting from scratch each time.

    Step-by-Step Guide to Importing XML Presets in Alight Motion

    Step 1: Download the XML Preset

    Before you can import an XML preset, you need to have one on your device. You can find many free and premium XML presets online:

    • Creative Communities: Websites like YouTube, forums, and social media groups often share presets.
    • Personal Websites: Many content creators offer downloadable presets on their blogs or platforms.

    Make sure to download the XML file to a location you can easily access.

    Step 2: Open Alight Motion

    1. Launch the Alight Motion app on your mobile device.
    2. Tap the “+” icon to create a new project.
    3. Select the aspect ratio that suits your video (e.g., 9:16 for Instagram Stories or WhatsApp status).

    Step 3: Import the XML Preset

    1. Access the Project Menu: After setting up your project, tap on the screen to bring up the layer options.
    2. Add Layer: Tap the “+” icon to add a new layer.
    3. Import Project:
      • Select the option labeled “Import Project.”
      • Navigate to the folder where you saved the XML file.
      • Select the XML preset you want to import.

    Step 4: Customize Your Project

    After importing, the preset layers will appear in your project. You can:

    • Adjust Layers: Move, resize, or rotate layers to fit your video.
    • Edit Text: If the preset includes text, tap on the text layer to customize the message, font, and color.
    • Fine-tune Effects: Explore additional effects and adjustments in the layer settings to make the preset your own.

    Step 5: Preview and Export

    1. Preview Your Video: Tap the play button to see how the animations and effects look in real time.
    2. Export Your Project:
      • Once satisfied, tap the export button (usually an upward arrow).
      • Choose the quality and format that best fits your needs, and save it to your device.
    Download XML

    Tips for Using XML Presets Effectively

    • Choose High-Quality Presets: Ensure that the presets you download are from reputable sources to avoid compatibility issues.
    • Experiment: Don’t hesitate to tweak the presets to fit your style. Adding your personal touch can enhance creativity.
    • Save Frequently: Alight Motion occasionally experiences bugs; regularly save your project to prevent losing progress.

    Conclusion

    Creating Urdu status videos in Alight Motion is a fun and rewarding process. With its intuitive features and endless possibilities for customization, you can craft videos that capture your audience’s attention and convey your message beautifully. Whether you’re sharing quotes, personal thoughts, or festive greetings, Alight Motion has everything you need to bring your ideas to life.

    Call to Action

    Ready to get started? Download some exciting XML presets today and transform your video editing experience in Alight Motion! If you have any questions or need assistance, feel free to leave a comment below.
  • How to Upscale Photos to 16K

    How to Upscale Photos to 16K with Keai.ai

    In the digital age, the demand for high-resolution images has skyrocketed. Whether for professional photography, digital art, or high-definition displays, the need for images that retain sharpness and detail at larger sizes has become crucial. One of the leading solutions in the realm of photo enhancement and upscaling is Keai.ai, an advanced AI-powered tool designed to elevate image quality to unprecedented levels. In this comprehensive guide, we’ll explore how you can use Keai.ai to upscale your photos to an astounding 16K resolution, transforming your visual content into ultra-high-definition masterpieces.

    What is Keai.ai?

    Keai.ai is an advanced photo enhancement platform that leverages artificial intelligence to deliver superior image quality. With cutting-edge algorithms designed for high-resolution upscaling, Keai.ai can transform images by increasing their resolution while preserving, and often enhancing, the clarity and detail. This tool is especially useful for photographers, designers, and anyone needing to produce images with exceptional sharpness and quality.

    Why Upscale to 16K?

    Before diving into the specifics of using Keai.ai, it’s important to understand why upscaling to 16K might be necessary or beneficial:

    1. Professional Standards: For high-end photography, commercial printing, and large-format displays, 16K resolution ensures that images remain crisp and clear, even when viewed up close or on very large screens.
    2. Future-Proofing: As display technology advances, higher resolutions become standard. Preparing images in 16K ensures they are ready for future technologies and platforms.
    3. Enhanced Detail: Upscaling to 16K allows for the display of intricate details that might be missed at lower resolutions, providing a richer and more immersive viewing experience.
    4. Versatility: High-resolution images can be downscaled to lower resolutions without losing quality, making them versatile for various applications while maintaining high standards.

    Getting Started with Keai.ai

    To upscale your photos to 16K using Keai.ai, follow these detailed steps:

    1. Create an Account and Log In

    First, navigate to the Keai.ai website. If you’re a new user, you’ll need to create an account. This typically involves providing your email address, creating a password, and verifying your account. For existing users, simply log in using your credentials.

    2. Upload Your Image

    Once logged in, locate the upload section on the platform. Keai.ai supports a range of file formats, so ensure your image is in a supported format (e.g., JPEG, PNG, TIFF). Drag and drop your image file into the designated area or use the upload button to select it from your device.

    3. Select the 16K Upscaling Option

    Keai.ai offers various upscaling options, typically ranging from 2K to 16K. Choose the 16K resolution option to start the enhancement process. This is often found in the settings or resolution dropdown menu.

    4. Adjust Enhancement Settings

    Before processing, you might have the option to fine-tune the enhancement settings. Keai.ai allows adjustments such as:

    • Noise Reduction: Minimize unwanted noise and graininess in your image.
    • Detail Enhancement: Increase the clarity and definition of fine details.
    • Color Correction: Adjust color balance and saturation for a more vibrant appearance.

    Customize these settings based on your preferences and the nature of your image.

    5. Initiate the Upscaling Process

    Click on the “Enhance” or “Upscale” button to begin the upscaling process. The time required will vary depending on the size of the original image and the complexity of the enhancement. Keai.ai uses sophisticated algorithms to ensure that the image quality is preserved or even improved during the upscaling.

    6. Download Your Upscaled Image

    Once the process is complete, you’ll receive a notification or see a download link. Click the link to download your 16K image. Ensure to check the file size, as 16K images can be significantly large.

    7. Review and Post-Processing

    After downloading, review the upscaled image to ensure it meets your expectations. You might want to use additional photo editing software for further tweaks or adjustments. Even with advanced tools like Keai.ai, final touch-ups can enhance the image further.

    Tips for Optimal Results

    To get the best results from Keai.ai, consider the following tips:

    • Start with High-Quality Originals: The better the quality of the original image, the better the upscaled result will be.
    • Check for Artifacts: Post-processing can sometimes introduce artifacts. Inspect your image closely after upscaling.
    • Understand Limitations: While Keai.ai is powerful, no tool can create details that weren’t in the original image. Ensure your expectations align with what’s achievable.

    Photo Revolution to 16K and Beyond

    The world of photography has always been on a relentless pursuit of capturing the essence of a moment in ever-increasing detail and clarity. From the grainy black and white photographs of the early days to the high-resolution marvels of today’s digital cameras, the journey has been nothing short of remarkable. But what if we told you there’s a whole new level of detail waiting to be explored? Buckle up, photography enthusiasts, because Keai.ai is ushering in a new era of upscale photo quality, pushing the boundaries of resolution to a staggering 16K and beyond.

    The Upscaling Revolution: From Blurry to Breathtaking

    Imagine this: you have a cherished photograph, a memory captured on film or an early digital camera. It holds immense sentimental value, but the resolution leaves a lot to be desired. The details are fuzzy, the edges are soft, and it just doesn’t do justice to the scene it portrays. With Keai.ai’s revolutionary upscaling technology, that’s a thing of the past. Our powerful AI algorithms can analyze your low-resolution photos and meticulously reconstruct them, pixel by pixel, to create stunningly detailed 16K masterpieces.

    Beyond Resolution: The Power of AI-Driven Enhancement

    Keai.ai doesn’t just stop at throwing megapixels at your photos. Our AI goes beyond simple upscaling. It intelligently analyzes the content of your image, recognizing patterns, edges, and textures. It then uses this knowledge to fill in the gaps, not with generic noise, but with realistic details that complement the original picture. This means sharper edges, clearer faces, and a newfound vibrancy in colors that were previously lost in the haze of low resolution.

    Applications Abound: A Boon for Professionals and Hobbyists Alike

    The possibilities unlocked by Keai.ai’s 16K upscaling technology are truly endless. Here are just a few ways photographers of all levels can benefit:

    • Professional Photographers: Deliver exceptional quality to your clients, even if they were captured on older cameras. Upscale your portfolio images to create a stunning first impression.
    • Stock Photographers: Breathe new life into your existing library. Keai.ai can transform your collection into a treasure trove of high-resolution gems, perfect for today’s demanding stock photo market.
    • Hobbyists and Enthusiasts: Give your personal photos a new lease on life. Relive those precious memories in stunning detail, allowing you to zoom in and appreciate the finer aspects of your captured moments.

    The Future of Photography: A Canvas Limited Only by Imagination

    Keai.ai’s 16K upscaling technology is just the beginning. As AI continues to evolve, we can expect even higher resolutions and even more sophisticated enhancement techniques. Imagine a future where you can not only upscale your photos but also manipulate them in ways never thought possible. Perhaps adding realistic elements to a scene, or transforming a low-resolution image into a work of art with different styles and effects. The possibilities are truly limitless.

    Click Here

    Join the Keai.ai Upscaling Revolution

    Keai.ai is here to democratize access to high-resolution photography. We believe that everyone should have the opportunity to experience their photos in stunning detail, regardless of the limitations of the original camera. Whether you’re a seasoned professional or a passionate hobbyist, Keai.ai is your gateway to the future of photo enhancement.

    Embrace the power of AI-driven upscaling. Upscale your photos today and unlock a world of breathtaking detail with Keai.ai.

    P.S. Stay tuned for further updates as Keai.ai continues to push the boundaries of what’s possible in the realm of photo enhancement. We’re constantly innovating and developing new features to empower photographers of all levels. The future of photography is bright, and Keai.ai is at the forefront of this exciting revolution.

    Conclusion

    Upscaling photos to 16K resolution with Keai.ai opens up new possibilities for visual content, enabling stunning clarity and detail that meets the highest standards. By following the steps outlined above, you can harness the power of AI to transform your images into ultra-high-definition assets, perfect for professional use and future technologies. Whether you’re a photographer, designer, or digital artist, Keai.ai provides the tools needed to push the boundaries of image quality and resolution. Embrace the future of photo enhancement and explore the extraordinary potential of 16K upscaling with Keai.ai.

  • 8K Quality Video Editing

    The Future of Visual Excellence: A Comprehensive Guide to 8K Quality Video Editing

    In the rapidly evolving landscape of digital media, 8K resolution stands out as the pinnacle of visual quality. As video technology advances, 8K resolution, with its staggering 7680 x 4320 pixels, offers unparalleled clarity and detail. For content creators, filmmakers, and tech enthusiasts, mastering 8K video editing opens doors to an extraordinary level of precision and immersion. This comprehensive guide explores the intricacies of 8K video editing, from understanding the technology to practical tips for achieving stunning results.

    Understanding 8K Resolution: A New Era of Clarity

    8K resolution, often referred to as Ultra High Definition 2 (UHD-2), boasts four times the number of pixels as 4K (3840 x 2160) and sixteen times that of Full HD (1920 x 1080). This exponential increase in pixel density translates into incredibly sharp images with remarkable detail. Such resolution is not merely about having more pixels; it’s about the depth of detail, the realism of textures, and the enhanced ability to crop or zoom without losing clarity.

    Key Benefits of 8K Resolution:

    • Increased Detail: With over 33 million pixels, 8K offers an unparalleled level of detail, making it ideal for large screens and immersive experiences.
    • Enhanced Flexibility: Editing in 8K allows for significant cropping or zooming while maintaining high resolution, which is particularly useful for post-production adjustments.
    • Future-Proofing: As content consumption shifts towards higher resolutions, producing in 8K ensures your content remains relevant and sharp on future display technologies.

    Preparing for 8K Video Editing: Essential Equipment and Software

    Editing 8K video is demanding, requiring robust hardware and specialized software to handle the high data rates and processing power required. Here’s what you need to get started:

    1. Hardware Requirements:

    • High-Performance CPU: An advanced multi-core processor is crucial for managing the heavy computational load of 8K video processing.
    • Powerful GPU: A high-end graphics card, such as those from NVIDIA’s RTX series or AMD’s Radeon Pro, is essential for smooth playback and rendering of 8K footage.
    • Ample RAM: 32GB of RAM is a minimum requirement, though 64GB or more is recommended for seamless multitasking and handling large files.
    • Fast Storage Solutions: SSDs (Solid State Drives) offer the speed necessary for real-time editing and quick file access. RAID configurations can further enhance performance.
    • High-Resolution Monitor: A monitor capable of displaying 8K resolution is essential for accurate color grading and detailed editing.

    2. Software Tools:

    Several video editing software platforms support 8K editing, offering a range of features tailored to high-resolution workflows:

    • Adobe Premiere Pro: Known for its extensive tools and plugins, Premiere Pro is a robust choice for 8K editing. Features like Lumetri Color and multi-cam editing enhance the creative process.
    • Final Cut Pro X: Apple’s flagship editing software offers powerful performance and optimized workflows for 8K content, particularly on Mac systems.
    • DaVinci Resolve: Renowned for its color grading capabilities, DaVinci Resolve provides a comprehensive suite for editing and grading 8K video, with both free and Studio versions available.
    • Avid Media Composer: A professional-grade solution used extensively in the film industry, Media Composer supports 8K workflows and offers advanced editing features.

    Editing 8K Video: Best Practices and Techniques

    Editing in 8K introduces unique challenges and opportunities. Here are some best practices to ensure optimal results:

    1. Organize Your Workflow:

    Efficient organization is crucial when dealing with massive 8K files. Implement a structured folder system for your media, and use metadata and markers to keep track of your footage. Consider creating proxies—lower-resolution versions of your clips—for smoother editing and quicker playback.

    2. Optimize Your System:

    Ensure your editing workstation is optimized for handling 8K content. Regularly update your graphics drivers and editing software to take advantage of the latest performance enhancements. Manage your cache and render files to prevent storage bottlenecks.

    3. Master Color Grading:

    8K resolution demands precise color grading to fully exploit its capabilities. Utilize the advanced color grading tools in your software to enhance contrast, saturation, and hue. Calibration of your monitor is also critical to ensure color accuracy throughout the editing process.

    4. Leverage Dynamic Range and HDR:

    Many 8K cameras capture footage with high dynamic range (HDR), providing a broader spectrum of colors and brightness levels. Utilize HDR capabilities to create stunning visuals with richer contrast and vibrant colors.

    5. Pay Attention to Detail:

    With 8K resolution, every detail is magnified. Scrutinize your footage for imperfections, such as noise or artifacts, and address them meticulously. High-resolution editing reveals minute flaws that may be imperceptible in lower resolutions.

    6. Render Settings and Exporting:

    When exporting 8K video, select the appropriate codec and settings to balance quality and file size. H.265 (HEVC) is a popular codec for 8K due to its efficient compression and high quality. Ensure that your export settings match the resolution and frame rate of your project.

    The Future of 8K Video: Trends and Innovations

    As technology continues to advance, the use of 8K video is becoming more widespread, influencing various industries:

    • Entertainment and Media: Streaming platforms and cinemas are gradually adopting 8K content to enhance viewer experiences with superior image quality.
    • Virtual Reality (VR) and Augmented Reality (AR): 8K resolution is crucial for creating immersive VR and AR experiences, where detail and clarity are paramount.
    • Surveillance and Security: High-resolution cameras offer detailed imagery for security purposes, improving surveillance and monitoring capabilities.

    Mastering 8K Video Editing in AirVidApp: A Comprehensive Guide

    In the realm of digital content creation, 8K resolution has emerged as the pinnacle of visual quality. Its exceptional detail, vibrant colors, and dynamic range offer a truly immersive viewing experience. AirVidApp, a powerful video editing platform, has recognized the significance of 8K and has integrated advanced features to cater to the needs of creators seeking to produce stunning high-resolution content. This comprehensive guide will delve into the intricacies of 8K video editing in AirVidApp, equipping you with the knowledge and skills to craft breathtaking visuals.

    Understanding 8K Resolution

    Before diving into the editing process, it’s essential to grasp the fundamentals of 8K resolution. 8K, or 7680×4320 pixels, boasts a staggering four times the resolution of 1080p Full HD. This means that 8K videos capture significantly more detail, making them ideal for large screens, virtual reality experiences, and professional applications.

    Key Considerations for 8K Video Editing

    1. Hardware Requirements: Editing 8K videos demands substantial computing power. Ensure your system is equipped with a high-performance processor, ample RAM, and a dedicated graphics card capable of handling large files and complex editing tasks.

    2. Storage Capacity: 8K footage generates massive files. Invest in high-capacity storage solutions, such as solid-state drives (SSDs) or external hard drives, to accommodate your project’s needs.

    3. Workflow Optimization: To streamline your editing process, consider using proxy files. These are lower-resolution versions of your 8K footage that are easier to work with during editing. Once you’ve finalized your edits, you can render the final output in 8K.

    AirVidApp’s 8K Editing Capabilities

    AirVidApp offers a robust set of features designed to facilitate 8K video editing:

    1. Native 8K Support: The platform can directly import, edit, and export 8K videos without compromising quality.
    2. Timeline Precision: AirVidApp’s timeline provides granular control over your 8K footage, allowing you to make precise edits and transitions.
    3. Advanced Color Grading: Enhance the visual appeal of your 8K videos with a wide range of color grading tools, including color correction, white balance adjustment, and LUT application.
    4. Special Effects and Transitions: Add dynamic elements to your 8K projects using a variety of special effects and transitions, such as keyframing, motion tracking, and green screen effects.
    5. Audio Editing: Fine-tune the audio track of your 8K videos using tools like noise reduction, equalization, and audio effects.
    6. Export Options: AirVidApp supports exporting your 8K videos in various formats, including MP4, MOV, and AVI, to ensure compatibility with different platforms and devices.
    Download App
    Download IOS

    Tips for Effective 8K Video Editing

    1. Optimize Your Workflow: Establish an efficient workflow by organizing your media files, creating project folders, and using shortcuts to speed up your editing process.
    2. Leverage Presets: Take advantage of AirVidApp’s built-in presets for color grading, transitions, and effects to save time and achieve consistent results.
    3. Experiment with Different Formats: Explore different video formats to find the one that best suits your specific needs in terms of quality, file size, and compatibility.
    4. Consider Cloud Storage: If your project requires frequent collaboration or remote access, consider using cloud-based storage solutions to store and manage your 8K files.

    Conclusion: Embracing the 8K Revolution

    The advent of 8K resolution represents a significant leap forward in video technology, offering unparalleled clarity and detail. For video editors and content creators, mastering 8K video editing is both a challenge and an opportunity. By investing in the right equipment, utilizing advanced software tools, and following best practices, you can unlock the full potential of 8K resolution and produce stunning, high-quality content that stands out in a rapidly evolving media landscape.

    For more information click here…….

  • Cricket Video Editing in Alight Motion

    Cricket, one of the most beloved sports globally, is more than just a game; it’s a passion, a celebration, and for many, a way of life. With the increasing popularity of social media and video-sharing platforms like YouTube, Instagram, and TikTok, fans and players alike are eager to share their favorite cricket moments with the world. Whether it’s a jaw-dropping catch, a thrilling boundary, or a match-winning moment, capturing and editing these highlights has become a popular trend.

    Alight Motion, one of the most powerful video editing apps available today, offers a wide range of features that enable users to edit cricket videos with a professional touch. From slow-motion replays to dynamic transitions and advanced text animations, Alight Motion gives you the tools to make your cricket videos stand out.

    In this detailed blog post, we will explore everything you need to know about cricket video editing in Alight Motion—from basic edits to advanced techniques. By the end of this guide, you’ll have the knowledge and skills to create visually appealing and engaging cricket videos.

    1. Introduction to Alight Motion

    1.1 What is Alight Motion?

    Alight Motion is a powerful, feature-rich video editing and motion graphics app available on both Android and iOS platforms. It’s designed for creators of all levels, from beginners to professionals, and is particularly popular for creating dynamic and engaging videos. Alight Motion stands out because of its wide array of features, including keyframe animation, visual effects, color correction, transitions, and more.

    1.2 Why Choose Alight Motion for Cricket Video Editing?

    Cricket video editing requires precision, creativity, and flexibility—whether you’re editing highlights from a professional match or personal cricket moments with friends. Alight Motion offers the perfect blend of tools for editing sports videos, with capabilities to add slow-motion replays, enhance dramatic moments with effects, and bring out the thrill of the game.

    1.3 Key Features for Editing Cricket Videos

    • Keyframe Animation: Allows for frame-by-frame animation, perfect for slow-motion shots or replay sequences.
    • Color Grading: Adjust the color tones to match the feel of the match—whether it’s a sunny day or a night game.
    • Text and Motion Graphics: Add dynamic text to highlight scores, players, or match moments.
    • Transitions and Effects: Seamlessly blend different shots or angles for a professional look.

    2. Getting Started with Alight Motion

    2.1 Installing and Setting Up the App

    The first step in creating stunning cricket videos is to download and install the Alight Motion app. It’s available on both the Google Play Store and Apple App Store. Once installed, you can either start a new project or import existing cricket footage.

    2.2 Understanding the Interface

    The Alight Motion interface is intuitive yet packed with features. Key sections include:

    • Timeline: Where you’ll arrange and edit your cricket clips.
    • Media Panel: For importing videos, images, and audio files.
    • Tools: Offering various options such as trimming, effects, and keyframe controls.

    2.3 Importing Cricket Footage

    Once the app is set up, you can import your cricket footage from your device’s gallery. Alight Motion supports a variety of formats, ensuring that whatever device you’ve recorded the match on—whether it’s a DSLR, smartphone, or GoPro—you can easily import and begin editing.


    3. Essential Editing Techniques for Cricket Videos

    3.1 Trimming and Cutting Clips

    The first step in any video editing process is trimming and cutting clips to focus on the key moments. In cricket, this could mean cutting out unnecessary parts of the match and focusing on wickets, boundaries, and crucial deliveries.

    • Select the Trim tool in Alight Motion and drag the ends of the clip to adjust the duration.
    • Use the Split tool to divide long clips into shorter segments, making it easier to work with different parts of the match.

    3.2 Adding Slow Motion for Highlights

    Slow-motion replays are a hallmark of cricket videos, adding drama and excitement to key moments like a fast bowler’s delivery or a fielder’s acrobatic catch.

    • Select the clip you want to slow down.
    • In the Speed tool, reduce the speed to your desired level—typically around 0.5x to 0.75x.
    • Preview the clip to ensure the slow-motion effect enhances the moment without distorting the quality.

    3.3 Using Split-Screen Effects for Multiple Angles

    In cricket, capturing multiple angles of a single moment can provide a more dynamic perspective. Alight Motion offers split-screen effects, allowing you to showcase different views simultaneously.

    • Import both angles of the shot into your project.
    • Use the Split-Screen effect from the effects panel, and align both clips side by side.
    • Adjust the timing to ensure both clips sync up perfectly.

    3.4 Implementing Motion Graphics for Scoreboards

    Scoreboards are a crucial part of any cricket video, helping viewers stay engaged and informed about the match’s progress.

    • Add a new layer in Alight Motion and choose Text from the media options.
    • Input the score, player names, or statistics.
    • Use keyframe animations to have the scoreboard update dynamically throughout the match.

    4. Adding Transitions and Effects

    4.1 Seamless Transitions for Smooth Video Flow

    To maintain the excitement of your cricket video, transitions can help move smoothly between clips, especially when transitioning from one moment to another (like a wicket to a celebration).

    • Open the Transitions panel and select from a variety of pre-made transitions like fades, swipes, and zooms.
    • Drag the transition effect between two clips to apply.

    4.2 Highlighting Key Moments with Zoom Effects

    Zoom effects can help highlight important moments, such as a ball flying toward the boundary or a crucial bowler’s delivery.

    • Select the Zoom tool, and apply it to the portion of the clip you want to emphasize.
    • Adjust the zoom intensity for a subtle or dramatic effect.

    4.3 Color Grading and Adjusting Contrast for Professional Quality

    Professional-grade cricket videos often use color grading to enhance the atmosphere, making day games brighter or adding contrast to night matches.

    • Navigate to the Color Correction tab.
    • Adjust the brightness, contrast, and saturation for a more visually appealing result.
    • Apply a specific color tone (like blue for night games) to give the footage a cinematic look.

    5. Enhancing Cricket Videos with Text and Animations

    5.1 Adding Text Overlays for Player Names and Scores

    Adding player names and scores is essential for making your cricket videos informative and professional.

    • Use the Text tool to create overlays for player introductions or to display real-time scores.
    • Customize fonts, colors, and placement to suit your video’s style.

    5.2 Creating Dynamic Titles for Intro Sequences

    An engaging intro sets the tone for your video. Use dynamic titles with animations to make your cricket video stand out.

    • Select a Title Template or create your own with the Text Tool.
    • Add animations such as a fade-in or slide for a more dynamic intro.

    5.3 Using Motion Tracking for Highlighting Players

    Motion tracking allows you to follow specific players as they move across the screen, making it easy to focus on the action.

    • Apply the Motion Tracking tool to lock onto a player.
    • Adjust the tracking speed and direction to ensure the camera follows the action seamlessly.

    6. Audio and Sound Effects in Cricket Videos

    6.1 Syncing Commentary with the Video

    Adding commentary enhances the excitement of your cricket videos. Whether you’re using existing commentary or recording your own, syncing it with the footage is crucial.

    • Import the audio file into Alight Motion.
    • Use the Sync Tool to align the commentary with the corresponding video moments.

    6.2 Adding Sound Effects for Impact

    Sound effects, such as the sound of a ball hitting the bat or the crowd cheering, can enhance your video’s realism.

    • Choose from Alight Motion’s sound library or import your own effects.
    • Place the effects in key moments to amplify their impact.

    6.3 Balancing Background Music with Natural Game Sounds

    Background music can add drama and emotion, but balancing it with the natural sounds of the game is essential.

    • Adjust the volume of your background music to ensure it doesn’t overpower the game sounds.
    • Use fades to transition music in and out during important moments.

    7. Exporting and Sharing Your Cricket Video

    7.1 Choosing the Right Export Settings

    To ensure your cricket video looks great when shared, choosing the right export settings is crucial.

    • Navigate to the Export menu and select your preferred resolution (1080p or 4K is recommended for higher quality).
    • Choose the frame rate that matches your original footage (usually 30fps or 60fps).

    7.2 Optimizing for Social Media Platforms

    Each social media platform has different requirements for video uploads. Make sure to choose the right aspect ratio for each.

    • For YouTube, a 16:9 aspect ratio is best.
    • For Instagram, use a 1:1 or 9:16 aspect ratio for vertical videos.

    7.3 Tips for Uploading to YouTube and Instagram

    • On YouTube, use proper titles, tags, and descriptions to improve visibility.
    • For Instagram, use hashtags and captions to engage viewers and boost interaction.

    8. Advanced Techniques for Professional Cricket Video Edits

    8.1 Creating Match Recap Montages

    A match recap montage combines the best moments from the game into a seamless, fast-paced video.

    • Select the top highlights from the match.
    • Use quick transitions, music, and effects to build excitement.

    8.2 Advanced Color Correction for Dramatic Effects

    • Apply advanced color grading to create specific moods, like cool tones for tense moments or warm tones for celebrations.

    8.3 Using 3D Effects for Enhanced Visuals

    For a cutting-edge feel, use 3D effects to bring depth to your cricket video.

    • Apply 3D layers to certain elements like the scoreboard, making them appear more lifelike and interactive.

    Downlaod XML

    Conclusion:

    Cricket video editing in Alight Motion gives you the power to transform raw footage into visually stunning content. Whether you’re a fan sharing memorable moments or a professional creating match highlights, the app’s extensive toolkit makes the editing process seamless and enjoyable. With this guide, you’re now equipped to create high-quality cricket videos that will captivate your audience.

    For more information click here…….

  • Pubg 4k Video Editing Tutorial

    The Ultimate Guide to PUBG 4K Video Editing on Mobile: Step-by-Step Tutorial

    In the world of mobile gaming, PUBG (PlayerUnknown’s Battlegrounds) reigns supreme, captivating players with its intense battle royale action. For gamers and content creators alike, producing high-quality 4K videos of your PUBG gameplay can set your content apart from the rest. But how do you achieve stunning 4K video quality using just your mobile device? This comprehensive guide will walk you through the process of editing PUBG 4K videos on mobile, from capturing your gameplay to sharing your final masterpiece. Let’s dive into the ultimate PUBG 4K video editing tutorial designed specifically for mobile users!

    Why Edit PUBG Videos in 4K on Mobile?

    Editing PUBG videos in 4K on mobile devices allows you to produce high-quality content without needing a powerful PC. With advancements in mobile technology, editing apps have become increasingly sophisticated, offering tools and features that can rival those on desktop platforms. This guide will help you leverage these tools to create professional-grade 4K videos directly from your smartphone or tablet.

    Step 1: Setting Up Your Mobile Device

    Before diving into video editing, ensure your mobile device is equipped for the task:

    1.1. High-Resolution Display

    Ensure your device has a high-resolution display to view 4K content accurately. Look for devices with a 4K screen or at least a high-resolution display to get the best editing experience.

    1.2. Adequate Storage and Performance

    4K video files are large and require significant processing power. Make sure your device has:

    • Sufficient Storage: At least 64 GB of internal storage or expandable storage via microSD.
    • Powerful Processor: A recent model with a high-performance CPU and GPU.

    1.3. Reliable Internet Connection

    A stable internet connection is essential for downloading apps and uploading your final video to platforms like YouTube or social media.

    Step 2: Capturing PUBG Gameplay in 4K

    2.1. Choose the Right Recording App

    Select a mobile app that supports 4K recording. Some popular options include:

    • AZ Screen Recorder: Offers high-quality recording options.
    • Mobizen Screen Recorder: Known for its user-friendly interface and high-resolution capabilities.
    • DU Recorder: Provides various resolution settings, including 4K.

    2.2. Configure Recording Settings

    1. Open your chosen recording app and navigate to the settings or preferences section.
    2. Set the resolution to 3840 x 2160 (4K).
    3. Adjust the frame rate to 60 FPS for smooth and fluid video.
    4. Choose a high bitrate to maintain video clarity and detail.

    2.3. Record Your Gameplay

    1. Launch PUBG and start the recording app.
    2. Begin your gameplay session and ensure you capture all the exciting moments.
    3. Stop recording once you’ve finished playing to save your footage.

    Step 3: Importing Your 4K Footage

    3.1. Select an Editing App

    Choose a mobile video editing app that supports 4K resolution. Some highly recommended apps include:

    • KineMaster: Offers robust editing features and supports 4K video.
    • Adobe Premiere Rush: Provides powerful editing tools and cloud integration.
    • PowerDirector: Known for its user-friendly interface and advanced features.

    3.2. Import Your 4K Footage

    1. Open your editing app and create a new project.
    2. Set the project settings to 4K resolution (3840 x 2160).
    3. Import your recorded PUBG footage into the project library.

    Step 4: Editing Your PUBG 4K Video

    4.1. Organize Your Clips

    1. Sort your footage into different categories such as gameplay highlights, kills, and strategic plays.
    2. Drag and drop clips onto the timeline to begin assembling your video.

    4.2. Trim and Cut

    1. Use trimming tools to remove unnecessary parts of your clips.
    2. Cut out any errors or downtime to keep the video engaging and fast-paced.

    4.3. Add Transitions and Effects

    1. Incorporate smooth transitions between clips to ensure a cohesive flow.
    2. Apply effects such as slow motion, fast motion, or zoom to highlight key moments.

    4.4. Enhance Audio

    1. Adjust audio levels to balance in-game sounds and background music.
    2. Add music or sound effects from the app’s library or import your own.
    3. Use audio filters to improve sound quality and remove background noise.

    4.5. Color Grading

    1. Apply color correction to enhance the visual appeal of your video.
    2. Adjust brightness, contrast, and saturation to make your footage look vibrant and clear.

    4.6. Add Text and Graphics

    1. Include text overlays for commentary, player stats, or to emphasize significant moments.
    2. Use graphics and animations to make your video more engaging and informative.

    Step 5: Exporting Your 4K Video

    5.1. Set Export Settings

    1. Choose the export format: MP4 is widely supported and maintains good quality.
    2. Set the resolution to 3840 x 2160 (4K).
    3. Select a high bitrate to ensure the video quality remains sharp.

    5.2. Export Your Video

    1. Choose the destination folder on your device.
    2. Start the export process and wait for the app to render your video. This may take some time depending on the length and complexity of your project.

    Step 6: Uploading and Sharing

    6.1. Upload to Platforms

    1. YouTube: Ideal for reaching a broad audience. Ensure you select 4K quality during upload.
    2. Social Media: Share your video on platforms like Instagram, Twitter, or Facebook to engage with your followers.
    3. Gaming Forums: Post your video on forums and communities to reach fellow gamers.

    6.2. Optimize for SEO

    1. Use relevant keywords in your video title, description, and tags. Example: “PUBG Epic 4K Gameplay Moments.”
    2. Create an eye-catching thumbnail to attract viewers.
    3. Write a compelling description with relevant details and timestamps for key moments.

    Editing a 4K PUBG video in Wink (a simplified editing software) can be a bit different from using professional tools like Adobe Premiere Pro or DaVinci Resolve. While Wink isn’t widely known as a video editor (often associated with creating tutorials and presentations), if you’re referring to a user-friendly tool with basic video editing features, you’ll need to focus on the essentials. Here’s a basic guide to help you through the process:

    1. Set Up Your Project

    • Open Wink: Launch the Wink application.
    • Create New Project: Start a new project and select the option for video editing if available.

    2. Import Footage

    • Upload Video Files: Use the import feature to add your 4K PUBG footage to the project. Wink may have a straightforward drag-and-drop interface or an import dialog.
    • Organize Clips: Arrange your clips in a logical order on the timeline if Wink provides one.

    3. Basic Editing

    • Trim and Cut: Use the trim or cut tools to remove unwanted sections from your video. Look for simple options like cutting at a start and end point.
    • Combine Clips: If you have multiple clips, use the merge function to combine them into a single video.

    4. Add Transitions and Effects

    • Transitions: Add basic transitions (like fades or wipes) between clips if Wink supports them.
    • Effects: Apply any available effects to enhance your video. This might include simple color adjustments or filters.

    5. Add Text and Overlays

    • Text: Insert text overlays for titles, captions, or annotations. Customize font, size, and color if Wink allows.
    • Overlays: Add any image overlays or graphics relevant to your PUBG video, like logos or HUD elements.

    6. Include Audio

    • Background Music: Import and add background music to your video. Adjust the volume so it complements your gameplay.
    • Voiceover: If Wink supports audio recording, you can record and add voiceover commentary. Otherwise, import pre-recorded audio files.

    7. Color Adjustment

    • Basic Corrections: Make basic color adjustments if the software allows. This might include adjusting brightness, contrast, and saturation.

    8. Export Your Video

    • Export Settings: Choose the export option and set the resolution to 4K (3840 x 2160). Select the appropriate format (typically MP4 for most uses).
    • Quality Settings: Opt for high quality to ensure your video maintains its 4K resolution during export.

    9. Review and Finalize

    • Preview: Watch your exported video to ensure everything looks and sounds as expected.
    • Adjust if Necessary: Make any final tweaks if needed and re-export if necessary.

    Additional Tips

    • Project Backup: Save your project frequently and keep backup copies to avoid data loss.
    • Performance: Ensure your computer can handle 4K video processing, as even simplified tools can require significant resources.
    Download
    Download IOS

    Conclusion

    Editing PUBG videos in 4K on your mobile device is not only feasible but also an excellent way to produce high-quality content on the go. By following this detailed tutorial, you can capture, edit, and share stunning 4K gameplay videos that highlight your skills and engage your audience. Embrace these tips and techniques to elevate your PUBG content and stand out in the competitive world of gaming videos.

    For More Information Click Here….

  • The Trend of Changing Faces with AI

    Revolutionizing Cricket Videos: The Trend of Changing Faces with AI

    In the ever-evolving landscape of digital content, artificial intelligence (AI) continues to push the boundaries of what’s possible. The Trend of Changing Faces with AI. One of the most fascinating trends currently capturing attention is the ability to change faces in videos using AI technology. This trend is particularly notable in the realm of sports, with cricket videos being a prime example of how AI can be used to alter the appearance of players, create unique content, and enhance viewer engagement.

    What Is Face Swapping in Cricket Videos?

    Face swapping, powered by AI, refers to the process of replacing a person’s face with another’s in video content. This technology uses sophisticated algorithms and deep learning models to map one face onto another, creating a realistic and seamless effect. In cricket, this can mean swapping the faces of players, coaches, or even fans in video highlights, match replays, or promotional content.

    How Does AI Face Swapping Work?

    AI face swapping involves several key technologies and processes:

    1. Facial Recognition and Detection

    AI systems begin by detecting and recognizing faces within a video. This involves identifying key facial features and mapping them using a process called facial landmarking. These landmarks help the AI understand the structure and position of facial features, such as eyes, nose, and mouth.

    2. Deep Learning Models

    Deep learning models, particularly those based on Generative Adversarial Networks (GANs), play a crucial role. GANs consist of two neural networks: a generator and a discriminator. The generator creates new images (in this case, the face swap), while the discriminator evaluates the authenticity of these images. Through continuous training, these models learn to produce highly realistic face swaps.

    3. Image and Video Synthesis

    Once the AI has learned how to generate a new face, it synthesizes this face onto the existing video footage. This involves blending the swapped face with the original body movements, ensuring that the transition is smooth and realistic. The result is a video where the swapped face seamlessly integrates with the original video content.

    4. Post-Processing

    To enhance realism, additional post-processing techniques are often used. This may include adjusting lighting, shadows, and color grading to ensure that the swapped face matches the original video environment perfectly.

    Why Is This Trend Gaining Popularity?

    1. Entertainment and Humor

    Face swapping adds an element of fun and humor to cricket videos. Imagine swapping the face of a well-known player with that of a coach or a fan during a memorable moment in a match. Such videos can go viral, providing entertainment and laughter for viewers.

    2. Personalization

    For fans, face swapping offers a personalized experience. Some platforms allow users to swap their own faces into cricket highlights or promotional videos, creating a unique and engaging way to connect with their favorite sport.

    3. Marketing and Promotion

    Brands and teams are increasingly using AI face swapping for promotional purposes. By integrating famous personalities or influencers into cricket content, they can capture the attention of a broader audience and create memorable marketing campaigns.

    4. Creative Content

    For content creators, face swapping opens up new creative possibilities. It allows them to experiment with different scenarios, create mashups, and craft innovative narratives that capture viewers’ attention.

    Real-World Examples of AI Face Swapping in Cricket

    1. Interactive Fan Engagement

    Some cricket clubs have implemented face swapping in their fan engagement strategies. Fans can upload their photos and see themselves as players in famous cricket moments. This personalized touch not only delights fans but also boosts interaction with the sport.

    2. Marketing Campaigns

    During major cricket tournaments, brands have used face swapping to feature celebrities or fictional characters in cricket-related content. These campaigns are designed to be eye-catching and memorable, leveraging the novelty of AI technology to stand out.

    3. Social Media Trends

    Social media platforms have seen a surge in face-swapped cricket videos, with users creating and sharing their own versions of famous cricket highlights. These videos often become viral sensations, demonstrating the broad appeal and versatility of the technology.

    The Ethical Considerations

    While AI face swapping offers exciting possibilities, it also raises important ethical considerations:

    1. Consent and Privacy

    Using someone’s likeness without permission can lead to privacy violations. It’s crucial to obtain consent from individuals whose faces are being swapped, especially in commercial or public contexts.

    2. Misuse and Misinformation

    Face swapping can be misused to create misleading or harmful content. There’s a risk that AI-generated videos could be used to spread misinformation or create deceptive content. It’s important for creators and viewers to be aware of these risks and to approach face-swapped content with a critical eye.

    3. Authenticity and Trust

    As AI technology becomes more advanced, distinguishing between real and altered content can become challenging. This raises concerns about the authenticity of media and the potential for erosion of trust in digital content.

    How to Create Your Own AI Face-Swapped Cricket Videos

    If you’re interested in experimenting with face swapping in cricket videos, here’s a simple guide to get started:

    1. Choose the Right Tools

    Several AI-powered tools and apps are available for face swapping. Popular options include DeepFaceLab, Reface, and Zao. Choose a tool that suits your needs and offers the features you require.

    2. Prepare Your Footage

    Select high-quality cricket videos and clear photos of the faces you want to swap. The better the quality of your source material, the more realistic the final result will be.

    3. Upload and Configure

    Upload your video and photos to the chosen tool. Follow the instructions to configure the face swap settings, including selecting the faces and adjusting the animation parameters.

    4. Generate and Edit

    Generate the face-swapped video and review the results. Use editing software if needed to refine the video, adjust lighting, and make any final tweaks.

    5. Share and Enjoy

    Once you’re satisfied with your creation, share it with your friends or on social media. Enjoy the reactions and feedback from viewers who are likely to be impressed by your innovative use of AI.

    Conclusion

    The trend of changing faces in cricket videos using AI is a testament to the incredible advancements in technology and the creative potential it unlocks. From enhancing fan engagement to creating memorable marketing campaigns, AI face swapping is revolutionizing how we experience and interact with sports content. As this technology continues to evolve, we can expect even more exciting and innovative applications in the world of cricket and beyond.

    So, whether you’re a cricket fan, a content creator, or just someone intrigued by the possibilities of AI, face swapping offers a fascinating glimpse into the future of digital media. Embrace the trend, experiment with new ideas, and enjoy the creative journey that AI has to offer!

  • A Comprehensive Guide to Animating with Luma AI

    Bringing Your Photos to Life: A Comprehensive Guide to Animating with Luma AI

    In the digital age, transforming static images into dynamic, engaging content is more accessible than ever. One of the most exciting tools in this space is Luma AI, a groundbreaking technology that breathes life into your photos, turning them into captivating videos. Whether you’re a content creator, a social media enthusiast, or just someone looking to add a creative touch to your personal photos, Luma AI offers an innovative way to animate your images effortlessly.

    What is Luma AI?

    Luma AI is an advanced tool that leverages artificial intelligence to animate still photos. By analyzing your images, Luma AI can add motion and depth, making them appear as though they are alive. This is achieved through sophisticated algorithms that understand the context of your photos and then generate realistic animations. The result? Photos that move, breathe, and tell a story.

    Why Use Luma AI?

    1. Enhance Engagement: Animated photos are far more engaging than static images. They can grab attention quickly, making them ideal for social media, marketing, or personal projects.
    2. Tell a Story: Animation can add a narrative element to your photos. Whether it’s bringing historical images to life or showcasing a moment from a trip, animation can add depth and context.
    3. Boost Creativity: Luma AI allows for creative freedom, enabling you to experiment with different effects and styles to match your vision.

    Getting Started with Luma AI

    Before diving into the animation process, you’ll need to get familiar with Luma AI. Here’s a step-by-step guide to help you get started:

    Step 1: Sign Up and Access Luma AI

    First, you’ll need to create an account on the Luma AI platform. Visit the Luma AI website and sign up using your email or social media accounts. Once you’re logged in, you’ll have access to the various tools and features offered by Luma AI.

    Step 2: Upload Your Photos

    After logging in, you can start by uploading the photos you want to animate. Luma AI supports various file formats, so you can upload JPEGs, PNGs, and more. To ensure the best results, choose high-quality images with clear, distinct subjects.

    Step 3: Choose Animation Style

    Luma AI offers a range of animation styles and effects. Whether you want subtle motion, dramatic shifts, or artistic transformations, you can select a style that fits your needs. Browse through the available options and choose the one that best suits your project.

    Step 4: Customize Your Animation

    Once you’ve selected an animation style, you can customize it to your liking. Adjust parameters such as motion speed, effect intensity, and animation duration. Luma AI provides intuitive sliders and controls to help you fine-tune the animation to your exact specifications.

    Step 5: Preview and Adjust

    Before finalizing your animation, preview it to see how it looks. This step allows you to make any necessary adjustments. Check for any elements that may need tweaking and make sure the animation flows smoothly.

    Step 6: Export and Share

    When you’re satisfied with your animated photo, it’s time to export it. Luma AI allows you to save your animation in various formats, including MP4 and GIF. Choose the format that best suits your needs and download the file. You can now share your animated photo on social media, incorporate it into your presentations, or use it however you like.

    Tips for Creating Stunning Animations

    1. High-Quality Photos: Start with high-resolution images to ensure that your animation looks crisp and clear. Avoid blurry or pixelated photos for the best results.
    2. Focus on Composition: Well-composed photos often yield better animations. Pay attention to the framing, lighting, and subject of your photo.
    3. Experiment with Styles: Don’t be afraid to try different animation styles and effects. Experimentation can lead to unique and unexpected results.
    4. Keep It Simple: Sometimes less is more. A subtle animation can often be more effective than a complex one.
    5. Consider Your Audience: Tailor your animations to your target audience. For instance, playful animations might work well for social media, while more professional animations might be better suited for business presentations.

    Real-World Applications of Luma AI

    1. Social Media Content: Animate your photos to create eye-catching posts and stories. Animated content tends to attract more engagement and can help boost your social media presence.
    2. Marketing Campaigns: Incorporate animated images into your marketing materials to create compelling advertisements and promotional content.
    3. Personal Projects: Use Luma AI to animate cherished family photos, travel snapshots, or special events. Animated photos make for memorable gifts or keepsakes.
    4. Educational Content: Create engaging educational materials by animating historical photos, diagrams, or scientific illustrations. Animation can make complex topics easier to understand.

    Troubleshooting Common Issues

    1. Image Quality: If your animation appears blurry or pixelated, ensure you’re using high-resolution images. Low-quality photos can affect the final output.
    2. Animation Not Smooth: If the animation is choppy, try adjusting the motion speed and effect intensity. Sometimes, tweaking these parameters can smooth out the animation.
    3. Export Problems: If you encounter issues with exporting, check the file format settings and ensure that your internet connection is stable during the download process.

    Conclusion

    Animating photos with Luma AI is a fantastic way to add a new dimension to your images. Whether you’re looking to enhance your social media presence, create engaging marketing content, or simply add a creative touch to your personal photos, Luma AI offers powerful tools to make it happen. By following this guide, you’ll be well-equipped to transform your still images into dynamic, animated works of art.

    So go ahead—give Luma AI a try and watch your photos come to life in ways you never imagined. Happy animating!

    Read more post here

  • HD Face Photo Editing in Autodesk SketchBook

    Mastering Photo Editing in Autodesk SketchBook

    Introduction

    Autodesk SketchBook is a powerful tool for artists, designers, and illustrators. While it’s primarily known for its sketching capabilities, it’s also a great choice for photo editing. In this blog post, we’ll explore how to enhance your photos using SketchBook.

    Importing Your Image

    1. Open SketchBook: Launch the app on your device.
    2. Import Image: In the toolbar, click on “Import Image.”
    3. Choose Your Photo: Select the image you want to edit from your device.
    4. Position and Adjust: Use the Transform tools to resize, move, and rotate the image as needed.

    Basic Edits

    1. Brightness and Contrast:
      • Go to the Layer Editor and adjust the Brightness/Contrast layer.
      • Increase brightness to make the image lighter or decrease it for a darker look.
      • Adjust contrast to enhance details.
    2. Color Corrections:
      • Create a new layer and set its blending mode to Color.
      • Use the Brush tool with a low opacity to paint over areas that need color correction.

    Advanced Techniques

    1. Layer Masks:
      • Add a layer mask to isolate specific parts of the image.
      • Use the Brush tool with black or white to reveal or hide portions selectively.
    2. Filters and Effects:
      • Explore the Filters menu for effects like Gaussian BlurSharpen, and Distort.
      • Apply filters to create unique looks.

    Final Touches

    1. Save Your Work: Once satisfied, save your edited image.
    2. Export Options: Choose the appropriate format (JPEG, PNG, etc.) for your needs.

    Mastering

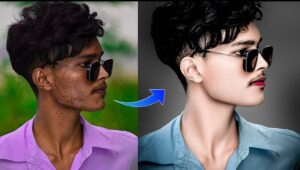
    HD Face Photo Editing in Autodesk SketchBook

    1. Importing Your Face Photo

    1. Open SketchBook: Launch the app on your device.
    2. Import Image: Click on “Import Image” in the toolbar.
    3. Choose Your Photo: Select a high-resolution face photo from your gallery.
    4. Position and Adjust: Use the Transform tools to resize, move, and rotate the image until the face is centered.

    2. Basic Retouching

    1. Skin Smoothing:
      • Create a new layer and name it “Skin.”
      • Use the Brush tool with a soft brush and low opacity.
      • Paint over blemishes, wrinkles, and uneven skin tones.
      • Adjust the layer opacity to maintain a natural look.
    2. Brighten Eyes and Teeth:
      • Create separate layers for eyes and teeth.
      • Use the Dodge tool to brighten the whites of the eyes and teeth.
      • Adjust the layer opacity for a subtle effect.

    3. Digital Makeup

    1. Lip Color:
      • Create a new layer for lips.
      • Use the Brush tool to apply lipstick or lip gloss.
      • Experiment with blending modes (Overlay, Soft Light) for realistic results.
    2. Eyeshadow and Eyeliner:
      • Create separate layers for eyeshadow and eyeliner.
      • Use soft brushes and adjust opacity.
      • Blend colors to create a natural or dramatic look.

    4. Advanced Techniques

    1. Frequency Separation:
      • Duplicate your image layer.
      • Apply a Gaussian Blur to the duplicate layer.
      • Set the original layer to “Linear Light” blending mode.
      • Use the duplicate layer to retouch imperfections without affecting texture.
    2. Sculpting and Contouring:
      • Create a new layer for contouring.
      • Use the Brush tool with a low opacity.
      • Add shadows to define cheekbones, jawline, and nose.

    5. Creative Effects

    1. Digital Painting:
      • Experiment with brushes, blending modes, and layers.
      • Turn your face photo into a digital painting by adding strokes and textures.
    2. Surreal Edits:
      • Combine face photos with other images (e.g., landscapes, textures).
      • Use layer masks to seamlessly blend elements.

    6. Final Touches and Export

    1. Save Your Work:
      • Save your edited image as a SketchBook file (for future edits).
      • Export a high-resolution JPEG or PNG for sharing.
    HD Face Photo Editing in Autodesk SketchBook

    HD Face Photo Editing: Unleashing Your Inner Artist with Autodesk SketchBook

    Autodesk SketchBook, often hailed as a digital canvas for artists, has quietly emerged as a powerful tool for photo editing as well. While primarily known for its drawing and painting capabilities, its versatile feature set allows for meticulous manipulation of images, particularly when it comes to enhancing facial features. Let’s delve into the world of HD face photo editing using this often overlooked gem.

    Why Choose Autodesk SketchBook for Face Editing?

    You might wonder why an art app would be your go-to for photo editing. The answer lies in its precision and control. Unlike many photo editing software that offer pre-set filters and automated enhancements, SketchBook empowers you to take granular control over every aspect of your image.

    • High Resolution Canvas: SketchBook supports high-resolution images, ensuring that even the minutest details of a face are preserved and enhanced.
    • Versatile Brush Set: From soft airbrushes for subtle adjustments to hard-edged brushes for precise corrections, SketchBook offers a vast array of tools tailored for facial editing.
    • Layer Functionality: This indispensable feature allows you to work non-destructively, experimenting with different effects without affecting the original image.
    • Customization: With customizable brushes, colors, and blending modes, you can create a truly unique and personalized look.

    A Step-by-Step Guide to HD Face Editing

    1. Import Your Image: Begin by importing your high-resolution photo into SketchBook. Ensure the image is clear and well-lit for optimal results.
    2. Duplicate the Layer: Create a duplicate of the original layer to preserve the original image. This layer will be your canvas for edits.
    3. Skin Refinement:
      • Use a soft airbrush to gently smooth out skin imperfections.
      • Employ a darker shade to add subtle shadows for depth and contour.
      • Enhance facial features like cheekbones and jawline by adding highlights and shadows.
    4. Eye Enhancement:
      • Use a small, hard brush to define the iris and pupil.
      • Add highlights to the eyes to make them sparkle.
      • Carefully adjust the eyebrow shape and thickness.
    5. Lip Perfection:
      • Create a base color for the lips using a soft brush.
      • Add highlights and shadows to give the lips a 3D appearance.
      • Use a darker shade to define the lip line.
    6. Color Correction:
      • Adjust the overall color tone of the image if needed.
      • Use color balance or hue/saturation tools for fine-tuning.
    7. Sharpening:
      • Apply a subtle sharpening effect to enhance facial details.
      • Be cautious to avoid over-sharpening, which can lead to a harsh look.

    Beyond the Basics

    While these steps provide a foundation for HD face editing in SketchBook, the possibilities are endless. Experiment with different brush techniques, layer blending modes, and color combinations to achieve your desired look. Consider using the app’s symmetry tools for precise adjustments to facial features.

    Face Enhancement with Autodesk SketchBook

    In an era dominated by heavily filtered, often unrealistic beauty standards, digital art offers a unique opportunity to explore a more nuanced approach to facial enhancement. Autodesk SketchBook, a powerful yet intuitive digital painting tool, provides a canvas for artists to refine features, correct imperfections, and enhance natural beauty without resorting to drastic alterations.

    The Art of Smoothing: A Balanced Approach

    Smoothing skin should aim to create a flawless, natural appearance rather than an artificial mask. Here’s a step-by-step guide:

    1. Duplicate Layer: Create a duplicate of your original layer to preserve the original image.
    2. Low Opacity Brush: Use a soft airbrush with low opacity to gently blend over imperfections. Focus on areas with blemishes, pores, or fine lines.
    3. Frequency Separation (Optional): For more advanced users, frequency separation can help isolate texture and color information, allowing for precise smoothing.
    4. Blending Modes: Experiment with blending modes like Soft Light or Overlay to subtly enhance the smoothed effect.

    Whitening with Care: A Delicate Touch

    Whitening should complement the overall skin tone and avoid creating an unnatural appearance.

    1. Color Balance: Use the Hue/Saturation adjustment layer to subtly shift the overall color temperature towards warmer tones.
    2. Dodge and Burn: Carefully lighten areas like the forehead, cheekbones, and nose bridge to create a subtle brightening effect.
    3. Local Adjustments: Use a brush to selectively brighten specific areas, such as the under-eye area, while maintaining natural shadows.
    Download

    Conclusion

    Autodesk SketchBook empowers you to create professional-grade HD face edits. Whether you’re retouching portraits or exploring artistic effects, let your creativity flow. Remember to practice, experiment, and enjoy the process!

    Download Ios
  • Master the Trending Bike Explosion Effect Reel with CapCut

    Have you noticed a surge of eye-catching Reels featuring bike explosion effect in a fiery spectacle? This trendy effect has taken social media by storm, and with good reason. It’s a quick, dynamic way to grab attention and add a dose of humor or surprise to your videos.

    But achieving this effect might seem daunting at first. Fear not, fellow content creator! This guide will walk you through mastering the bike explosion effect reel using CapCut, a free and user-friendly video editing app.

    What You’ll Need:

    • A smartphone with CapCut installed (available on iOS and Android)
    • Your video clip (preferably featuring a bike)
    • (Optional) A pre-made explosion effect overlay (available for free download online)

    Step-by-Step Guide:

    1. Import Your Video Clip:
      • Launch CapCut on your smartphone. Tap the “+” icon on the main screen to begin a new project.
      • In the project window, select “Video” and choose your desired video clip featuring the bike.
    2. Setting Up the Beat Marks (Optional):(This step is recommended for a more synchronized effect)
      • While your video clip is selected on the timeline, tap the “Edit” icon on the right side panel (represented by three dots).
      • Within the editing menu, locate the “Beat” option denoted by a musical note symbol.
      • Here, CapCut analyzes the audio of your video and automatically places beat markers based on the rhythm.
      • You can manually adjust these markers by dragging them on the timeline to align with the explosion effect (explained later). bike explosion effect
    3. Strategic Cuts and Zooms:
      • To create a dynamic and impactful effect, consider strategically cutting your video clip.
      • Tap and hold on the video clip on the timeline to split it into multiple segments.
      • Focus on creating cuts just before a natural pause in your bike’s movement (e.g., right before the bike hits a bump). bike explosion effect
      • Once your video is chopped into sections, tap and hold on a segment to access the editing options.
      • Here, explore the “Zoom” feature to subtly zoom in on the bike in each segment. This adds a sense of anticipation before the explosion.
    4. Introducing the Explosion Effect:There are two approaches to achieve the fiery explosion:A. Using Pre-made Overlays:
      • Numerous websites offer free explosion effect overlays in PNG format specifically designed for CapCut. Within CapCut, tap the “+” icon on the timeline and select “Overlay.”Locate the downloaded explosion effect overlay in your phone’s storage and add it to your project.You can resize and reposition the overlay on the screen to perfectly frame the bike.
      B. Creating a Custom Explosion Effect:
      • Unleash your creativity and craft your own explosion effect!
      • Use CapCut’s “Text” or “Stickers” options to add fiery elements like flames, smoke, and sparks.
      • Layer these elements on top of your bike clip to create a custom explosion.
      • Play around with opacity and animation features to achieve a dynamic effect.
    5. Fine-Tuning with Keyframes:
      • Keyframes allow you to precisely control how elements like the explosion overlay or zoom level change over time.
      • Select the video segment or overlay containing the explosion effect on the timeline.
      • Tap the “Animation” icon (diamond shape) on the right side panel.
      • Here, you’ll see options like “Opacity,” “Position,” and “Scale.” bike explosion effect
      • Tap and hold on the desired option to create a keyframe at the current point in your video.
      • Move the video playback marker to a different point (e.g., just before the explosion) and adjust the chosen option’s value (e.g., decrease opacity).
      • This creates a transition effect, like the explosion gradually fading in.
    6. Aligning with the Beat (Optional):
      • If you used the beat markers function earlier, this step ensures the explosion coincides with the music’s rhythm.
      • Drag the explosion effect (overlay or custom elements) on the timeline to align with a prominent beat marker.
      • By syncing the explosion with the music’s rhythm, you’ll enhance the overall impact and create a more satisfying viewing experience.
    7. Adding Audio Enhancements (Optional):
      • CapCut offers a variety of audio editing options to elevate your reel.
      • Explore adding sound effects like a booming explosion or sizzling flames

    Absolutely, here are some additional topics you can weave into your blog post to create a well-rounded and informative guide:

    Creative Twists on the Effect:

    • Genre Variations: Explain how to adapt the explosion effect for different video genres.
      • For comedic reels, consider using a more cartoony explosion effect.
      • For action-themed reels, focus on a more dramatic and powerful explosion.
    • Interactive Elements: Discuss incorporating interactive elements to boost audience engagement.
      • You could add a text overlay asking viewers to guess what explodes next.
      • Alternatively, use the explosion as a transition effect between different scenes in your reel.
    • Storytelling Integration: Explore how to integrate the explosion effect into a larger narrative within your reel.
      • Perhaps the bike explodes after a character makes a funny or unexpected decision.

    Pro Tips and Troubleshooting:

    • Optimizing for Reels: Offer insights on tailoring your edited reel for the Reels platform.
      • Discuss ideal video length, caption writing strategies, and relevant hashtag usage.
    • Common Pitfalls: Address common mistakes beginners might encounter while editing with CapCut.
      • For example, mention avoiding excessive zooming as it can be disorienting for viewers.
    • Advanced Techniques (Optional): If your target audience is familiar with basic CapCut editing, consider including a section on advanced techniques.
      • This could involve using green screens for more elaborate explosion effects or incorporating masking features for precise control over element placement.

    Beyond the Bike Explosion:

    • CapCut’s Editing Potential: Briefly showcase CapCut’s broader editing capabilities beyond this specific effect.
      • Mention features like text overlays, filters, and transitions to demonstrate the app’s versatility.
    • Alternative Trending Effects: Touch upon other popular CapCut editing trends viewers might be interested in exploring.
      • Briefly explain how to achieve effects like text animation or trendy transitions.

    By incorporating these additional topics, you’ll transform your blog post from a basic how-to guide into a valuable resource for anyone looking to create engaging and trendy Reels using CapCut.

    Of course! Let’s break down some of the additional topics into simpler, easier-to-understand sections for your blog post:

    Fun Variations on the Explosion Effect:

    • Comedy Capers: Turn the explosion into a laugh riot! Use a cartoony explosion with goofy sound effects for a lighthearted vibe.
    • Action Blast-Off: For an adrenaline rush, choose a more fiery and dramatic explosion with a booming sound effect.
    • Interactive Shenanigans: Get your viewers involved! Add a text overlay asking them to guess what explodes next, or use the explosion as a surprise transition between scenes.

    Storytelling with a Bang:

    • Story Time!: Weave the explosion effect into a mini-story within your reel. Did the biker make a bad decision that leads to a fiery explosion (in a funny way, of course!)?

    CapCut Champion Tips:

    • Reels Ready: Keep your Reels short and sweet, ideally between 15-30 seconds. Write a catchy caption that teases the explosion and use relevant hashtags like #bikeexplosioneffect or #capcutedit.
    • Editing Fails?: Don’t worry, everyone makes them! Avoid excessive zooming – it can make viewers dizzy.

    Beyond the Boom (Optional):

    • CapCut’s Magic Box: Let your readers know CapCut has tons of other cool features! Explore adding text overlays with fun fonts, applying trendy filters, or using smooth transitions between clips.
    • More Reel Fun: There’s a whole world of CapCut effects to discover! Briefly mention other trending edits like text animation or glitch transitions to spark their creativity.

    Remember, keep the language clear and engaging, using visuals where possible. Break down the steps with screenshots or short video snippets to make the editing process even easier to follow.

  • Exploring the Dynamic World of Noizz App

    In a world dominated by ever-evolving technology, apps have become our companions, offering an array of experiences at our fingertips. Noizz, such app that has been making waves in the realm of creativity and self-expression is Noizz. A unique platform that goes beyond the conventional, Noizz is redefining the way we engage with content, blending innovation and entertainment seamlessly.

    The Birth of Noizz:

    Noizz emerged as a trailblazer in the app landscape, driven by the idea of providing users with a space to unleash their creativity. Launched with a mission to break the monotony of traditional content creation, Noizz encourages users to think outside the box and redefine the boundaries of expression.

    Features that Set Noizz Apart:

    1. Dynamic Video Editing:
      Noizz stands out with its dynamic video editing features, empowering users to create captivating and visually stunning content. From trendy filters to cutting-edge effects, the app allows users to transform ordinary moments into extraordinary visual narratives.
    2. Interactive Challenges:
      Noizz fosters a sense of community through its interactive challenges. Users can participate in a wide range of challenges, from dance-offs to lip-sync battles, showcasing their talent and engaging with a global audience. This interactive element adds a competitive and social dimension to the app.
    3. AI-Powered Magic Effects:
      Leveraging the power of artificial intelligence, Noizz introduces magic effects that take creativity to a whole new level. These effects dynamically adapt to the content, creating an immersive and personalized experience for users.
    4. Music Library and Collaboration:
      With a vast music library spanning genres, Noizz ensures users have the perfect soundtrack for their creations. Additionally, the app facilitates collaboration, allowing users to join forces with others to produce collaborative masterpieces.

    Community and Global Reach:

    Noizz has successfully cultivated a vibrant and diverse community of creators. Through the sharing of content, users connect with like-minded individuals from around the globe, fostering a sense of unity in diversity. The app’s global reach has made it a melting pot of cultures, styles, and talents, further enriching the user experience.

    noizz

    Click here to download

    Innovation in Motion:

    What sets Noizz apart is its commitment to continuous innovation. The app consistently updates its features, ensuring that users always have access to the latest tools and trends in content creation. This dedication to staying at the forefront of technological advancements has solidified Noizz’s position as a dynamic and forward-thinking platform.

    Conclusion:

    Noizz is not just an app; it’s a movement that celebrates the boundless creativity within each of us. Whether you’re a seasoned content creator or someone looking to dip their toes into the world of self-expression, Noizz offers a platform where imagination knows no limits. As we navigate the digital landscape, Noizz stands as a testament to the transformative power of technology in fostering creativity, connecting communities, and making every moment an opportunity for expression.

    Video editing in the Noizz app is a straightforward process, thanks to its user-friendly interface and intuitive features. Here’s a step-by-step guide on how to do video editing in the Noizz app:

    1. Download and Install:

    Ensure that you have the Noizz app installed on your device. You can download it from the App Store (for iOS) or Google Play Store (for Android).

    Mod Apk (for Android). Pro Features

    2. Open the Noizz App:

    Launch the Noizz app on your device. If you don’t have an account, you may need to sign up or log in using your existing credentials.

    3. Select/Create a Video:

    • To edit an existing video, choose the video from your gallery by tapping on the “+” icon.
    • Alternatively, you can record a new video directly from the app by tapping on the camera icon.

    4. Explore Editing Options:

    • Once your video is selected, you’ll be directed to the editing interface. Explore the various editing options available at the bottom of the screen.

    5. Apply Filters:

    • Noizz offers a wide range of dynamic filters. Swipe left or right to preview and select the filter that suits your video. Tap on the filter to apply it.

    6. Add Magic Effects:

    • Experiment with Noizz’s AI-powered magic effects. These effects adapt to the content of your video, adding an extra layer of creativity. Find the “Magic” or “Effects” section and choose the desired effect.

    7. Adjust Speed and Trim:

    • Use the speed adjustment tool to control the pace of your video. You can create slow-motion or fast-forward effects.
    • Trim your video by dragging the edges of the timeline to select the portion you want to keep.

    8. Add Music:

    • Enhance your video by adding music from Noizz’s extensive library. Tap on the “Music” icon, choose a track, and adjust the volume as needed.

    9. Text and Stickers:

    • Express yourself further by adding text or stickers. Look for the text or sticker icons, select the one you like, and customize as necessary.

    10. Preview and Save:

    • Preview your edited video to ensure everything looks as you want it. If satisfied, tap on the “Save” or “Next” button.

    11. Share Your Creation:

    • Noizz is a social platform, so consider sharing your edited video on the app to engage with the community. You can also choose to save it to your device or share it on other social media platforms.

    12. Explore Challenges:

    • Noizz often features challenges. Explore these challenges, participate, and showcase your creativity to a broader audience.

    By following these steps, you can unlock the full potential of the Noizz app and create dynamic, visually appealing videos with ease. Don’t be afraid to experiment with different features to discover unique combinations that suit your style!

    check out more related posts…. Click here