Tag: Capcut intro

  • Download CapCut Pro 2025 Latest Version 2025 APK for Free


    Get the latest CapCut Pro 2025 APK for free. Unlock premium features, no watermark, and full editing tools. Direct download link available with installation guide


    ✅ Introduction

    Are you looking to download CapCut Pro latest version 2025 APK for free? You’ve come to the right place. CapCut Pro is one of the most powerful mobile video editors out there, especially popular among TikTok creators, vloggers, and social media influencers.

    On this page, you’ll find a safe and direct download link to get CapCut Pro APK 2025 with all premium features unlocked — no watermark, no subscription, and full editing power in your hands.


    🚀 What Is CapCut Pro 2025?

    CapCut Pro is the premium version of the popular CapCut app, developed by Bytedance (creators of TikTok). While the regular CapCut is free and functional, the Pro version unlocks a suite of advanced tools like:

    • ✅ Export without watermark
    • 🎞️ Premium filters & effects
    • 🎵 Full audio/music library access
    • 🖼️ 4K video export support
    • 🧠 AI-powered tools (auto captions, background remover)
    • 🎨 Advanced transitions and keyframe animations

    And with the 2025 update, everything is faster, smoother, and more customizable than ever before.


    🆕 What’s New in CapCut Pro 2025 APK?

    Here’s what makes the 2025 version of CapCut Pro stand out:

    • 🌟 New visual effects and transitions
    • 🔊 Expanded audio library with trending TikTok tracks
    • 🧠 AI-driven editing suggestions
    • ✂️ Auto-cut tools for syncing to music beats
    • 🌐 Multi-language support & improved UI
    • 🚀 Smoother performance and export times

    📥 CapCut Pro 2025 APK – App Info

    NameCapCut Pro
    Version2025 (Latest)
    Size~150MB
    CompatibilityAndroid 6.0+
    FeaturesPro Unlocked, No Ads, No Watermark
    Last UpdatedJuly 2025
    PriceFree

    🔗 Download CapCut Pro Latest Version 2025 APK [Direct Link]

    Click the button below to download CapCut Pro 2025 APK directly to your Android device:

    👉 Download CapCut Pro APK (2025)

    ⚠️ Note: Make sure to uninstall any previous versions of CapCut before installing this APK to avoid conflicts.


    📱 How to Install CapCut Pro 2025 APK on Android

    Follow these simple steps to install CapCut Pro 2025:

    1. Download the APK file from the link above.
    2. Go to Settings > Security > Enable Unknown Sources.
    3. Locate the downloaded file in your device’s Downloads folder.
    4. Tap on the file and hit Install.
    5. Once installed, open the app and start editing with Pro features unlocked!

    🛡️ Is This CapCut Pro APK Safe?

    Yes, the APK provided here is:

    • ✅ Tested for malware and viruses
    • ✅ Free from ads or spyware
    • ✅ No login required to access premium tools
    • ✅ 100% working and updated to the latest 2025 version

    We ensure that each APK is scanned before uploading to provide a safe experience for our users.


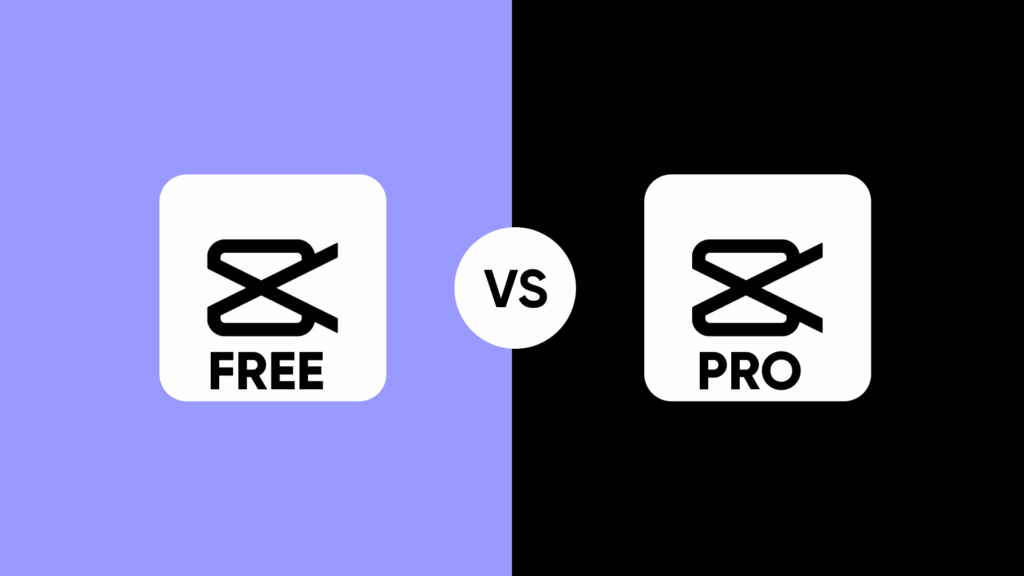
    💡 Why Use CapCut Pro APK Instead of the Free Version?

    Here’s what you’re missing out on with the free version:

    FeatureFree VersionPro APK
    Watermark✅ Yes❌ No
    4K Export❌ No✅ Yes
    Premium Effects❌ Limited✅ All Unlocked
    Transitions & Fonts❌ Limited✅ Full Access
    Ad-Free Experience❌ No✅ Yes

    By using this CapCut Pro 2025 APK, you unlock the full potential of the app without paying monthly fees or watching ads.


    🔄 Frequently Asked Questions (FAQ)

    Q1: Is CapCut Pro APK free to use?
    ✅ Yes! The version we offer here is completely free and Pro features are unlocked.

    Q2: Will I get updates automatically?
    ❌ No. Since this is a manual APK install, you’ll need to revisit this page to get the latest updates.

    Q3: Does this version work on all Android phones?
    ✅ Yes, it supports Android 6.0 and above.


    📣 Share This Page

    If you found this helpful, share it with your friends or fellow content creators. The more we share, the more people can enjoy premium video editing without spending a dime.


    📌 Conclusion

    With the CapCut Pro 2025 APK, you can take your video editing to the next level — no watermarks, no limits. Whether you’re making TikToks, YouTube Shorts, or Instagram Reels, this version gives you full access to everything the app has to offer.

    👉 Click here to download CapCut Pro 2025 APK now

    Stay creative, and happy editing! 🎬✨

    Visit more Here

  • Master the Trending Bike Explosion Effect Reel with CapCut

    Have you noticed a surge of eye-catching Reels featuring bike explosion effect in a fiery spectacle? This trendy effect has taken social media by storm, and with good reason. It’s a quick, dynamic way to grab attention and add a dose of humor or surprise to your videos.

    But achieving this effect might seem daunting at first. Fear not, fellow content creator! This guide will walk you through mastering the bike explosion effect reel using CapCut, a free and user-friendly video editing app.

    What You’ll Need:

    • A smartphone with CapCut installed (available on iOS and Android)
    • Your video clip (preferably featuring a bike)
    • (Optional) A pre-made explosion effect overlay (available for free download online)

    Step-by-Step Guide:

    1. Import Your Video Clip:
      • Launch CapCut on your smartphone. Tap the “+” icon on the main screen to begin a new project.
      • In the project window, select “Video” and choose your desired video clip featuring the bike.
    2. Setting Up the Beat Marks (Optional):(This step is recommended for a more synchronized effect)
      • While your video clip is selected on the timeline, tap the “Edit” icon on the right side panel (represented by three dots).
      • Within the editing menu, locate the “Beat” option denoted by a musical note symbol.
      • Here, CapCut analyzes the audio of your video and automatically places beat markers based on the rhythm.
      • You can manually adjust these markers by dragging them on the timeline to align with the explosion effect (explained later). bike explosion effect
    3. Strategic Cuts and Zooms:
      • To create a dynamic and impactful effect, consider strategically cutting your video clip.
      • Tap and hold on the video clip on the timeline to split it into multiple segments.
      • Focus on creating cuts just before a natural pause in your bike’s movement (e.g., right before the bike hits a bump). bike explosion effect
      • Once your video is chopped into sections, tap and hold on a segment to access the editing options.
      • Here, explore the “Zoom” feature to subtly zoom in on the bike in each segment. This adds a sense of anticipation before the explosion.
    4. Introducing the Explosion Effect:There are two approaches to achieve the fiery explosion:A. Using Pre-made Overlays:
      • Numerous websites offer free explosion effect overlays in PNG format specifically designed for CapCut. Within CapCut, tap the “+” icon on the timeline and select “Overlay.”Locate the downloaded explosion effect overlay in your phone’s storage and add it to your project.You can resize and reposition the overlay on the screen to perfectly frame the bike.
      B. Creating a Custom Explosion Effect:
      • Unleash your creativity and craft your own explosion effect!
      • Use CapCut’s “Text” or “Stickers” options to add fiery elements like flames, smoke, and sparks.
      • Layer these elements on top of your bike clip to create a custom explosion.
      • Play around with opacity and animation features to achieve a dynamic effect.
    5. Fine-Tuning with Keyframes:
      • Keyframes allow you to precisely control how elements like the explosion overlay or zoom level change over time.
      • Select the video segment or overlay containing the explosion effect on the timeline.
      • Tap the “Animation” icon (diamond shape) on the right side panel.
      • Here, you’ll see options like “Opacity,” “Position,” and “Scale.” bike explosion effect
      • Tap and hold on the desired option to create a keyframe at the current point in your video.
      • Move the video playback marker to a different point (e.g., just before the explosion) and adjust the chosen option’s value (e.g., decrease opacity).
      • This creates a transition effect, like the explosion gradually fading in.
    6. Aligning with the Beat (Optional):
      • If you used the beat markers function earlier, this step ensures the explosion coincides with the music’s rhythm.
      • Drag the explosion effect (overlay or custom elements) on the timeline to align with a prominent beat marker.
      • By syncing the explosion with the music’s rhythm, you’ll enhance the overall impact and create a more satisfying viewing experience.
    7. Adding Audio Enhancements (Optional):
      • CapCut offers a variety of audio editing options to elevate your reel.
      • Explore adding sound effects like a booming explosion or sizzling flames

    Absolutely, here are some additional topics you can weave into your blog post to create a well-rounded and informative guide:

    Creative Twists on the Effect:

    • Genre Variations: Explain how to adapt the explosion effect for different video genres.
      • For comedic reels, consider using a more cartoony explosion effect.
      • For action-themed reels, focus on a more dramatic and powerful explosion.
    • Interactive Elements: Discuss incorporating interactive elements to boost audience engagement.
      • You could add a text overlay asking viewers to guess what explodes next.
      • Alternatively, use the explosion as a transition effect between different scenes in your reel.
    • Storytelling Integration: Explore how to integrate the explosion effect into a larger narrative within your reel.
      • Perhaps the bike explodes after a character makes a funny or unexpected decision.

    Pro Tips and Troubleshooting:

    • Optimizing for Reels: Offer insights on tailoring your edited reel for the Reels platform.
      • Discuss ideal video length, caption writing strategies, and relevant hashtag usage.
    • Common Pitfalls: Address common mistakes beginners might encounter while editing with CapCut.
      • For example, mention avoiding excessive zooming as it can be disorienting for viewers.
    • Advanced Techniques (Optional): If your target audience is familiar with basic CapCut editing, consider including a section on advanced techniques.
      • This could involve using green screens for more elaborate explosion effects or incorporating masking features for precise control over element placement.

    Beyond the Bike Explosion:

    • CapCut’s Editing Potential: Briefly showcase CapCut’s broader editing capabilities beyond this specific effect.
      • Mention features like text overlays, filters, and transitions to demonstrate the app’s versatility.
    • Alternative Trending Effects: Touch upon other popular CapCut editing trends viewers might be interested in exploring.
      • Briefly explain how to achieve effects like text animation or trendy transitions.

    By incorporating these additional topics, you’ll transform your blog post from a basic how-to guide into a valuable resource for anyone looking to create engaging and trendy Reels using CapCut.

    Of course! Let’s break down some of the additional topics into simpler, easier-to-understand sections for your blog post:

    Fun Variations on the Explosion Effect:

    • Comedy Capers: Turn the explosion into a laugh riot! Use a cartoony explosion with goofy sound effects for a lighthearted vibe.
    • Action Blast-Off: For an adrenaline rush, choose a more fiery and dramatic explosion with a booming sound effect.
    • Interactive Shenanigans: Get your viewers involved! Add a text overlay asking them to guess what explodes next, or use the explosion as a surprise transition between scenes.

    Storytelling with a Bang:

    • Story Time!: Weave the explosion effect into a mini-story within your reel. Did the biker make a bad decision that leads to a fiery explosion (in a funny way, of course!)?

    CapCut Champion Tips:

    • Reels Ready: Keep your Reels short and sweet, ideally between 15-30 seconds. Write a catchy caption that teases the explosion and use relevant hashtags like #bikeexplosioneffect or #capcutedit.
    • Editing Fails?: Don’t worry, everyone makes them! Avoid excessive zooming – it can make viewers dizzy.

    Beyond the Boom (Optional):

    • CapCut’s Magic Box: Let your readers know CapCut has tons of other cool features! Explore adding text overlays with fun fonts, applying trendy filters, or using smooth transitions between clips.
    • More Reel Fun: There’s a whole world of CapCut effects to discover! Briefly mention other trending edits like text animation or glitch transitions to spark their creativity.

    Remember, keep the language clear and engaging, using visuals where possible. Break down the steps with screenshots or short video snippets to make the editing process even easier to follow.

  • Text Glowing Intro in CapCut 2023

    Text Glowing Intro, In the dynamic realm of video editing, CapCut stands out as a creative haven, offering a myriad of tools to bring your vision to life. One particularly mesmerizing feature that’s making waves is the Text Glowing Intro. In this article, we delve into the captivating world of glowing text intros in CapCut and explore how this feature can redefine your video content in 2023.

    1. Crafting an Enchanting Atmosphere with Typography

    The allure of a glowing intro starts with choosing the right typography. Delve into the artistic possibilities of fonts, ensuring they complement your content’s tone. Whether it’s a sleek modern font or a whimsical script, the typography sets the stage for the enchantment that follows.

    2. The Alchemy of Colors: Evoking Emotions

    Colors are the palette with which you paint your visual narrative. Dive into the psychology of colors and select hues that resonate with your message. Bold reds for excitement, serene blues for calmness, or mysterious purples for intrigue – each color choice contributes to the emotional resonance of your glowing text intro.

    3. Mastering the Glow: Techniques and Adjustments

    CapCut’s intuitive interface allows creators to wield the power of glow with finesse. Experiment with glow intensity and radius to find the sweet spot that complements your content. This isn’t just about aesthetics; it’s about using light to emphasize your message and create a visually captivating experience.

    4. Choreography of Light: Perfecting Timing

    Timing is the silent choreographer of your video. In the case of glowing intros, it’s crucial to sync the illumination with the rhythm of your content. Whether it’s a gradual unveiling or a sudden burst, precise timing enhances the overall impact, leaving your audience in awe.

    5. Illuminating Brand Identity: Beyond Aesthetics

    The glowing text intro isn’t merely a visual flourish; it’s a branding tool. Explore how incorporating a glowing intro aligns with your brand identity. From the choice of colors representing brand values to the font reflecting brand personality, every element contributes to a cohesive and memorable brand image.

    6. Elevating Engagement: Viewer Interaction Strategies

    Engagement is the heartbeat of online content. Discover strategies to leverage the glowing intro for increased viewer interaction. Encourage viewers to share their thoughts or create anticipation for what lies ahead, turning your glowing intro into a conversation starter.

    7. Beyond the Intro: Seamless Transitions and Consistency

    A glowing intro sets the stage, but consistency is the key to retaining viewer interest. Explore techniques for seamlessly transitioning from the glowing intro to the main content, ensuring a cohesive visual experience throughout your video.

    In conclusion, as we navigate the creative landscape of 2023, the Text Glowing Intro feature in CapCut emerges as more than just an embellishment – it’s a storytelling tool, a branding asset, and a catalyst for viewer engagement. Illuminate your content with these strategies and watch as your videos captivate and leave a lasting impression on your audience.

    check out more related posts…. Click here

  • How to create a Fire Effect Intro in CapCut

    To create a fire effect intro in CapCut, follow these general steps:

    1. Import Your Footage:
      Open CapCut and import the video footage you want to use for your intro.
    2. Add a Fire Effect:
      Look for the effects or stickers section in CapCut. There might be a specific “fire” effect or sticker you can add to your video.
    1. Adjust Placement and Duration:
      Drag the fire effect onto your video timeline. Adjust its size, position, and duration to fit your intro.
    2. Layering and Blending:
      If the fire effect doesn’t blend well with your footage, explore layering options or blending modes to make it look more realistic. This might be available in the settings for the specific effect or sticker.
    3. Customize Settings:
      Some effects allow you to customize their settings. Explore options like intensity, color, or transparency to fine-tune the fire effect to your liking.

    1. Add Transitions:
      Consider adding transitions to smoothly integrate the fire effect intro with the rest of your video. CapCut usually has a variety of transition options.
    2. Add Music and Text:
      Enhance your intro by adding background music and any necessary text or titles. CapCut provides tools for adding music and text overlays.
    3. Preview and Export:
      Preview your video to ensure the fire effect intro looks as you want it to. Once satisfied, export your video.

    Remember that specific steps might vary slightly based on the version of CapCut you are using, and the features available at the time. Always refer to the app’s official documentation for the most accurate and up-to-date instructions.